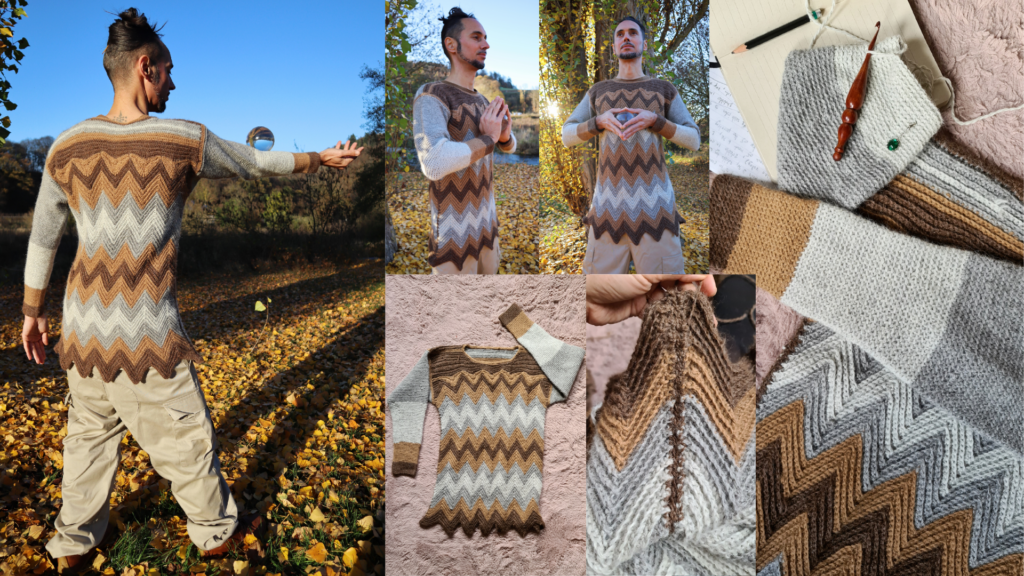
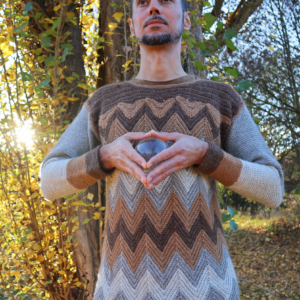
Crochet pullover is a must make for this season. A perfect gift for your loved ones. Read through my inspiration, design process, and a perfect yarn I chose. Or scroll down for the free pattern.
The inspiration + Design
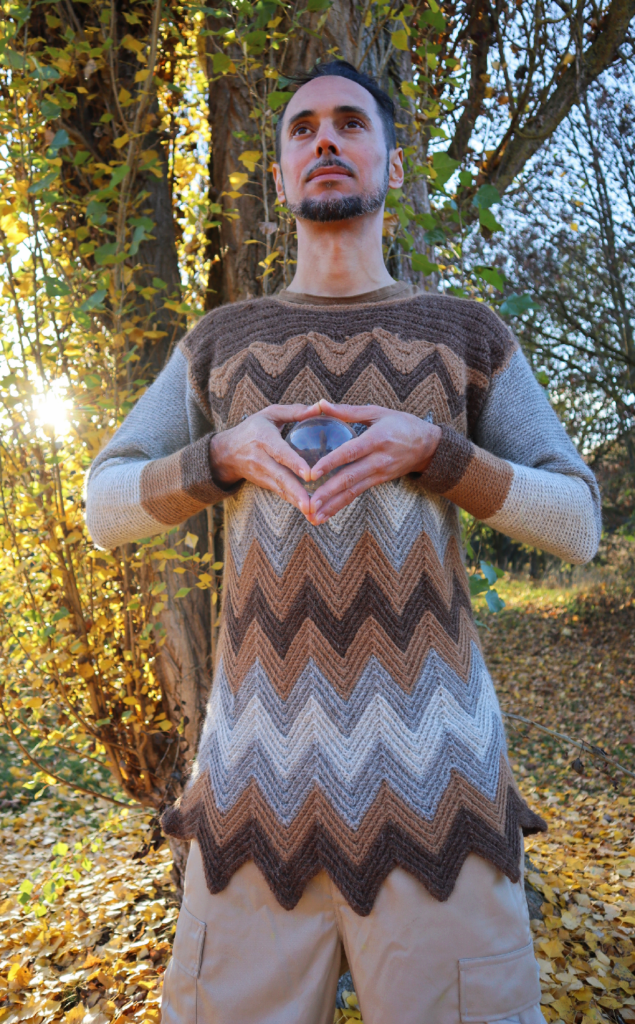
I always love chevron stitch and thought a crochet chevron sweater would be a great gift for my husband. Although, this pattern is a unisex sweater/pullover and you can pretty much make this one for everyone in your family including yourself. The pointing ends of the sweater giving a fairy look and feel. We love everything magical and woodland life, so this is a perfect piece for him.
The construction of this design is pretty simple so don’t let chevron stitch overwhelm you. After halfway through the panel, I kind of loving the repetitive of the stitch and it goes very smooth and rather fast.
I LOVE YOU Pullover is just 2 panels connected with an easy sleeve crocheted from the shoulder downward with scblo.
Yarn
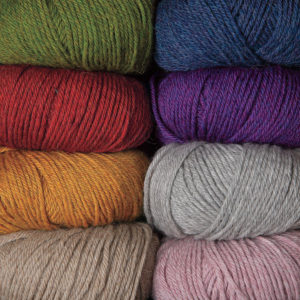
I choose to work with Simply Alpaca yarn because I am a huge fan of natural fiber. You can use any Aran weight yarn you want, but make sure you have enough of it. I have used 1800 yards to make this sweater/pullover.
PATTERN
- Get the ad-free, large print, printable PDF pattern HERE.
- Become a member and get all patterns throughout the month HERE.
- PIN this pattern to your Pinterest boards for later HERE.
Crochet | Skill level = Advanced
Material
- Aran weight yarn/#4. Simply Alpaca Colors: Alonzo (27489), Alfie (27490), Aldous (27486), Alton (27488) I used 1800 yards
- Hook 5 mm
- Measuring tape
- Stitch marker
- Yarn needle & scissors
The pattern contains | Well-written instructions + Chart (only for ad-free version) + Photos, video
Pattern measured in inches (“)
Gauge swatch
2 sets of 14 rows = 7″ W x almost 4”
Abbreviation US term
ch = chain
sc = single crochet
scblo = single crochet back loop only
scflo = single crochet front loop only
hdc = half double crochet
hdcblo = half double crochet back loop only
hdcflo = half double crochet front loop only
dc = double crochet
dcblo = double crochet back loop only
dcflo = double crochet front loop only
Tr = Treble crochet
Fphdc = front post half double crochet
sl st = slip stitch
sl kn = slip knot
st/sts = stitch/stitches
sk = skip
rep = repeat
sp = space
DEC = decrease
RS = right side
WS = wrong side
Note: The beginning ch if not stated as a stitch is simply meant to build up the yarn.
The pattern is 25 + 5ch
The diagram is a 3 set of 25 + 5ch
Note: When you start a long chain of 50 + 5 for the swatch the chain will be much longer than 7”. When you get to 14 rows it will SHRINK dramatically. It should be approximately 7”
R.1 – sc in 2nd ch from hook, sc in next ch, sk next ch, *1sc in each of next 11ch, 3sc in next ch, 1sc in each of next 11ch, sk2ch**, rep from*-**, ending with sk 1ch, 1sc in each of next 2ch, turn
R.2 – ch1, 1scBlo in each of next 2sc, sk next sc, *1scBlo in each of next 11sc, 3scBlo in next sc, 1scBlo in each of next 11sc, sk2sc**, rep from*-**, ending with sk1sc, 1scBlo in each of next 2sc, turn
Rep R.2 for the pattern
The measurement: Shoulder to shoulder
(The size below is according to the craft yarn council standard.)
S 15 ½ – 16”, M 16 ½ – 17”, L 17 ½ – 18”, XL 18” – 18 ½, 2XL 19” – 20”, 3XL 20” – 21”
4XL 21” – 21 ½, 5XL 22” – 22 ½
In this pattern, I am demonstrating XL 18”
My model’s measurement shoulder to shoulder is 18”
***I decided to make 6 sets instead of 5 as 5sets measure 17 ½ ***
It’s better to have it slightly wider. But you should not add more than one set from the measurement.
I made 6 sets of 25 + 5ch = 21”
All suggestion numbers in the pattern are only the guideline. Please measure along for the best fit.
Suggestion sets: ( I recommend you use your own measurement for the best fit.)
S, M 5sets, L, XL 6 sets, 2XL, 3XL, 4XL, 5XL 7sets
Colors code:
CHO = Chocolate, B = Brown, G =Gray, W = White
Back panel:
Here it is when it lays flat.
Here it is when pulled.
The stitch is quite elastic. The idea is to have positive ease but not oversized.
I made 90rows = 25”
CHO 7, B 7, G 7, W 8, G 7, B 7, CHO 7, B 7, G 7, W 7, G 7, B 7, B 5
DO NOT CUT THE YARN
Example calculation:
When planning to make the length of 30” stop your last chevron at 25” because after filling the valleys/gaps, there will be COV + sc rows and shaping the neckline rows.
Filling the valleys/gaps.
The edge: CHO
R.1 – ch1, 1scblo in each of next 3sc, sl st 2 times, turn
R.2 – ch1, sk 2sts, 1scblo in each of next 3sc, turn
R.3 – ch1, 1scblo in each of next 3sc, sl st 3 times, turn
R.4 – ch1, sk 2sts, 1scblo in each of next 4sts, turn
R.5 – ch1, 1scblo in each of next 4sc, sl st 4 times, turn
R.6 – ch1, sk 2sts, 1scblo in each of next 6sts, turn
R.7 – ch1, 1scblo in each of next 6sc, sl st 2 times, turn
R.8 – ch1, sk 2sts, 1scblo in each of next 6sts, turn
R.9 – ch1, 1scblo in each of next 6sc, sl st on top of the pointing hill.
***I am changing the color, so I ch1, cut the yarn. If you are using the same color just continue to the first valley which is now called Valley with the edge.***
IMPORTANT: The purpose of sl st on top of the Hills is only to finish each row and will not count as a stitch for this section. Please only count the stitches which are highlighted.
Valley with the edge: B
***sl st at the top of the same hill where you finished the edge if you are changing the color.***
R.1 – ch1, 1scblo in each of next 3sc, 1hdcblo in each of next 6sc, 1dcblo in each of next 2sc, dcblo 2tog (this is the bottom of the valley), 1dcblo in each of next 2sc, 1hdcblo in each of next 6sc, 1scblo in each of next 3sc, sl st on top of the hill, a total of 23sts, turn
R.2 – ch1, DO NOT SC INTO SL ST SINCE WE ARE NOT COUNTING SL ST AS A STITCH IN THE WHOLE ENTIRE OF THE VALLEYS SECTION, 1scblo in each of next 6sts, 1hdcblo in each of next 3sts, dcblo 2tog, 1dcblo in next st, dcblo 2tog, 1hdcblo in each of next 3sts, 1scblo in each of next 6sts, 1sc in each of next 6sts (sc over the edge), a total of 27sts, turn
R.3 – ch1, 1scblo in each of next 14sts, hdcblo 2tog, 1hdcblo in next st, hdcblo 2tog, 1scblo in each of next 8sts, sl st at the top of the hill, a total of 25sts. DO NOT CUT THE YARN continue to the next valley by following the steps below.
Second valley:
R.1 – ch1, 1scblo in each of next 3sc, 1hdcblo in each of next 6sc, 1dcblo in each of next 2sc, dcblo 2tog (this is the bottom of the valley), 1dcblo in each of next 2sc, 1hdcblo in each of next 6sc, 1scblo in each of next 3sc, sl st on top of the hill, a total of 23sts, turn
R.2 – ch1, DO NOT SC INTO SL ST SINCE WE ARE NOT COUNTING SL ST AS A STITCH IN THE VALLEYS SECTION, 1scblo in each of next 6sts, 1hdcblo in each of next 3sts, dcblo 2tog, 1dcblo in next st, dcblo 2tog, 1hdcblo in each of next 3sts, 1scblo in each of next 6sts, sl st, a total of 21sts, turn
R.3 – ch1, 1scblo in each of next 8sts, hdcblo 2tog, 1hdcblo in next st, hdcblo 2tog, 1scblo in each of next 8sts, sl st at the top of the hill, a total of 19sts, DO NOT CUT THE YARN
Rep Second valley until you have only 1 Valley left, ch1 and cut the yarn.
The edge on the other side: CHO
Sl kn at the corner of the edge, then rep all steps from the edge pattern above.
Valley with the edge: B
You are now working on the opposite side to the rest of the valleys. You will be making Flo instead of Blo.
***sl st at the top of the same hill where you finished the edge if you are changing the color.***
R.1 – ch1, 1scflo in each of next 3sc, 1hdcflo in each of next 6sc, 1dcflo in each of next 2sc, dcflo 2tog (this is the bottom of the valley), 1dcflo in each of next 2sc, 1hdcflo in each of next 6sc, 1scflo in each of next 3sc, sl st on top of the hill, a total of 23sts, turn
R.2 – ch1, DO NOT SC INTO SL ST SINCE WE ARE NOT COUNTING SL ST AS A STITCH IN THE WHOLE OF THE VALLEYS SECTION, 1scflo in each of next 6sts, 1hdcflo in each of next 3sts, dcflo 2tog, 1dcflo in next st, dcflo 2tog, 1hdcflo in each of next 3sts, 1scflo in each of next 6sts, 1sc in each of next 6sts (sc over the edge), a total of 27sts, turn
R.3 – ch1, 1scflo in each of next 14sts, hdcflo 2tog, 1hdcflo in next st, hdcflo 2tog, 1scflo in each of next 8sts, sl st at the top of the hill, ch1 and cut the yarn, a total of 25sts.
Coming out of valleys row (COV): CHO
The edge + valley with the edge (RS)
R.1 – sl kn at the first st at the edge, ch1, 1scblo at the same st, 1scblo in each of next 13sts, hdcblo 2tog x 3times, 1scblo in each of next 5sts, 1sc at the top of the hill, a total of 23sts
Second valley – 1scblo in each of next 7sts, hdcblo 2tog x 3times, 1scblo in each of next 6sts, 1sc at the top of the hill, a total of 17sts
Rep Second valley till the end of the row.
Last valley – 1scblo in each of next 7sts, hdcblo 2tog x 3times, 1scblo in each of next 12sts, a total of 22sts, turn
A total sts: S, M 79sts, L, XL 96sts, 2XL, 3XL, 4XL, 5XL 113sts
Sc rows: 20 rows measured approximately 3 ½
R.1 – ch1, 1scblo in each st across, a total of 96sc (S, M 79sc, L, XL 96sc, 2XL, 3XL, 4XL, 5XL 113sc)
R.2 rep R.1, a total of 96sc (S, M 79sc, L, XL 96sc, 2XL, 3XL, 4XL, 5XL 113sc)
***I am going to do some DEC in R.3 & R.5 to straighten the work. It is optional. I DEC by skipping the st, although I spread out the skipped st nicely.***
ch1, 1scblo in each st across with 6sts DEC, a total of 90sc
R.3 (DEC) – (L, XL 90sc, 2XL, 3XL, 4XL, 5XL 107sc)
S, M R.3 (DEC) – ch1, 1scblo in each st across with 4sts DEC, a total of 75sc
R.4 – ch1, 1scblo in each st across, a total of 90sc (S, M 75sc, L, XL 90sc, 2XL, 3XL, 4XL, 5XL 107sc)
R.5 (DEC) – ch1, 1scblo in each st across with 5sts DEC, a total of 85sc ( L, XL 85sc, 2XL, 3XL, 4XL, 5XL 102sc)
S, M R.5 – ch1, 1scblo in each st across, a total of 75sc
R.6 – ch1, 1scblo in each st across, a total of 85sc (S, M 75sc, L, XL 85sc, 2XL, 3XL, 4XL, 5XL 102sc)
R.7 rep R.6
B – R.8 – R.12 rep R.6 a total of 85sc (S, M 75sc, L, XL 85sc, 2XL, 3XL, 4XL, 5XL 102sc)
G – R.13 – R.16 rep R.6 a total of 85sc (S, M 75sc, L, XL 85sc, 2XL, 3XL, 4XL, 5XL 102sc)
W – R.17 – R.18 rep R.6 a total of 85sc (S, M 75sc, L, XL 85sc, 2XL, 3XL, 4XL, 5XL 102sc)
G – R.19 – R.20 rep R.6 a total of 85sc (S, M 75sc, L, XL 85sc, 2XL, 3XL, 4XL, 5XL 102sc)
Neckline: 4 rows measured approximately 1”
33scblo = 8”
Example calculation: A total st subtract 8” = ? divided by 2 = ?hdcblo + 33scblo (8”) + ?hdcblo
My calculation is 26hdcblo + 33scblo + 26hdcblo
Suggestion calculation:
S, M 21 + 33 + 21, L, XL 26 + 33 + 26, 2XL, 3XL, 4XL, 5XL 35 + 32 +35
***If you have an even number in your last row before starting the neckline, subtract 1 stitch from the middle number.***
G – R.1 – ch2, 1hdcblo in each of next 26sc, 1scblo in each of next 33sc, 1hdcblo in each of next 26sc, a total of 85sts, turn
R.2 rep R.1
CHO – R.3 & R.4 rep R.1
DO NOT CUT THE YARN
Side body:
Body/Belly same or less than shoulder:
When the widest part of the body/belly measures the same or less as the panel you only need to add sc row.
Sc row – ch1, adding 1sc on the side of your work evenly.
I made a total of 120 sc, ch1 cut the yarn.
Body/Belly wider than shoulder but not more than 5”:
Make 5 rows of sc each side.
Body/Belly wider than shoulder:
When the panel measure 21”, but the widest part of the body/belly measure 31”
31” subtract 21” = 10” divided by 4 = 2 ½ , you will be adding 2 ½ on each side of the body with OCEAN WAVES design (see below).
IMPORTANT: Your last row of OCEAN WAVES should be on R.4 or R.8.
Ocean waves design: A multiple of 16 + 1 (extra sc)
Watch the video on how to do Tr straight edge However, the video shows dc straight edge, you only need to add one more sc using the same method.
DO NOT UNDERESTIMATE THE STITCHES! The whole pattern of this part is not using the same stitches as it is a waving design and so the stitches are designed to be different along the row. THIS PART IS NOT FOR WATCHING NETFLIX!
The diagram shows 3 sets of 16 + 1 (extra sc)
Before starting R.1
- Add the stitch marker in the 15th st from the end. When you arrive there end the row as mentioned below.
R.1 – ch1, 1sc in each of the next 2sc, 1hdc in each of the next 2sc, 1dc in each of the next 2sc, 1Tr in each of next 4sc, 1dc in each of next 2sc, 1hdc in each of next 3sc, 1sc in next sc, ch1, sk1, 1sc in next sc, *1hdc in each of next 3sc, 1dc in each of the next 2sc, 1Tr in each of next 4sc, 1dc in each of next 2sc, 1hdc in each of next 2sc, 1sc in next sc, ch1, sk1, 1sc in next sc**, rep from*-** across, ending your last 15sts of this row with 1hdc in each of next 3sc, 1dc in each of the next 2sc, 1Tr in each of the next 4sc, 1dc in each of the next 2sc, 1hdc in each of the next 2sc, 1sc in each of next 2sc, turn
Note for R.1
- At the end of this row you will have one extra st added on your count because the last sc made on top of the extra sc (green one).
R.2 – ch1, 1sc in each st and ch-1sp across, turn
R.3 – ch1, 1sc in each st across, turn
Before starting R.4
- Add the stitch marker in the 10th st from the end. When you arrive there end the row as mentioned below.
R.4 – Tr straight edge (count as 1Tr), 1Tr in next sc, 1dc in each of next 2sc, 1hdc in each of next 3sc, *1sc in next sc, ch1, sk1, 1sc in next sc, 1hdc in each of next 3sc, 1dc in each of next 2sc, 1Tr in each of next 4sc, 1dc in each of next 2sc, 1hdc in each of next 2sc**, ending your last 10sts of this row with 1sc in next sc, ch1, sk1, 1sc in next sc, 1hdc in each of next 3sc, 1dc in each of next 2sc, 1Tr in each of next 2sc, turn
Before starting R.5
- Add the stitch marker in the 10th st from the end. When you arrive there end the row as mentioned below.
R.5 – Tr straight edge (count as 1Tr), 1Tr in next Tr, 1dc in each of next 2dc, 1hdc in each of next 3hdc, *1sc in next sc, ch1, sk ch-1sp, 1sc in next sc, 1hdc in each of next 2hdc, 1dc in each of next 2dc, 1Tr in each of next 4Tr, 1dc in each of next 2dc, 1hdc in each of next 3hdc**, rep from*-** across, ending your last 10sts of this row with 1sc in next sc, ch1, sk ch-1sp, 1sc in next sc, 1hdc in each of next 3hdc, 1dc in each of next 2dc, 1Tr in each of next 2Tr, turn
R.6 – R.7 rep R.2 & R.3
Before starting R.8
- Add the stitch marker in the 15th st from the end. When you arrive there end the row as mentioned below.
R.8 – ch1, 1sc in each of next 2sc, *1hdc in each of the next 2sc, *1dc in each of the next 2sc, 1Tr in each of the next 4sc, 1dc in each of the next 2sc, 1hdc in each of the next 3sc, 1sc in next sc, ch1, sk1, 1sc in next sc**, rep from*-** across, ending your last 15sts of this row with 1hdc in each of the next 3sc, 1dc in each of the next 2sc, 1Tr in each of the next 4sc, 1dc in each of the next 2sc, 1hdc in each of the next 2sc, 1sc in each of next 2sc, turn
R.9 – ch1, 1sc in each of next 2sc, 1hdc in each of the next 2hdc, 1dc in each of the next 2dc, 1Tr in each of the next 4Tr, 1dc in each of the next 2dc, 1hdc in each of the next 3hdc, *1sc in next sc, ch1, sk ch-1sp, 1sc in next sc, 1hdc in each of the next 3hdc, 1dc in each of the next 2dc, 1Tr in each of the next 4Tr, 1dc in each of the next 2dc, 1hdc in each of the next 2hdc**, rep from*-** across, ending this row with 1sc in each of next 2sc, turn
Rep R.2 – R.9 for the pattern
Front Panel:
Rep everything from the Back panel until COV (CHO).
Sc rows: CHO
R.1 – ch1, 1scblo in each st across, a total of 96sc (S, M 79sc, L, XL 96sc, 2XL, 3XL, 4XL, 5XL 113sc)
R.2 (DEC) – ch1, 1scblo in each st across with 6sts DEC, a total of 90sc (L, XL 90sc, 2XL, 3XL, 4XL, 5XL 107sc)
S, M R.2 (DEC) – ch1, 1scblo in each st across with 4sts DEC, a total of 75sc
R.3 (DEC) – ch1, 1scblo in each st across with 5sts DEC, a total of 85sc (L, XL 85sc, 2XL, 3XL, 4XL, 5XL 102sc)
S, M R.3 – ch1, 1scblo in each st across, a total of 75sc
Neckline:
33scblo = 8”
Example calculation: A total st subtract 8” = ? divided by 2 = ?dcblo + 33scblo (8”) + ?dcblo
My calculation is 26dcblo + 33scblo + 26dcblo
Suggestion calculation:
S, M 21 + 33 + 21, L, XL 26 + 33 + 26, 2XL, 3XL, 4XL, 5XL 35 + 32 +35
***If you have an even number in your last row before starting the neckline, subtract 1 stitch from the middle number.***
CHO R.1 – ch2, 1dcblo in each of next 26sc, 1scblo in each of next 33sc, 1dcblo in each of next 26sc, a total of 85sts (S, M 75sc, L, XL 85sts, 2XL, 3XL, 4XL, 5XL 102sts), turn
R.2 – R.4 rep R.1 a total of 85sts (S, M 75sc, L, XL 85sts, 2XL, 3XL, 4XL, 5XL 102sts), turn
R.5 – ch2, 1dcblo in each of next 26sc, sl st in each of next 33sc, 1dcblo in each of next 26sc, a total of 85sts (S, M 75sc, L, XL 85sts, 2XL, 3XL, 4XL, 5XL 102sts), turn
R.6 rep R.5 a total of 85sts (S, M 75sc, L, XL 85sts, 2XL, 3XL, 4XL, 5XL 102sts), turn
Shoulder:
R.7 (DEC) – ch1, 1scblo in each of next 24dc, scblo 2tog in the next sts, a total of 25sts (S, M 20sts, L, XL 25sts, 2XL, 3XL, 4XL, 5XL 34sts), turn
R.8 – ch1, 1scblo in each of st across, a total of 25sts (S, M 20sts, L, XL 25sts, 2XL, 3XL, 4XL, 5XL 34sts), turn
(DEC) R.9 rep R.7 a total of 24sts (S, M 19sts, L, XL 24sts, 2XL, 3XL, 4XL, 5XL 33sts), turn
R.10 rep R.8 a total of 24sts (S, M 19sts, L, XL 24sts, 2XL, 3XL, 4XL, 5XL 33sts), turn
(DEC) R.11 rep R.7 a total of 23sts (S, M 18sts, L, XL 23sts, 2XL, 3XL, 4XL, 5XL 32sts), turn
B R.12 – R.14 rep R.8 a total of 23sts (S, M 18sts, L, XL 23sts, 2XL, 3XL, 4XL, 5XL 32sts), ch1 and cut the yarn.
Note:
- I stopped here because my front panel now measures 30” which is the same as the back panel. You will need to do the same no matter how many inches your back panel has. Stop your shoulder part once you get the same length.
- I highly suggest you finish the other shoulder before adding the side body. This way you can have the model try it on and see if this would fit them well.
On the other shoulder: CHO
R.7 (DEC) – Sl kn at the corner edge of the side, ch1, 1scblo in the same st, 1scblo in each of the next 23hdc, 1scblo 2tog in the next sts, a total of 25sts, (S, M 20sts, L, XL 25sts, 2XL, 3XL, 4XL, 5XL 34sts), turn
R.8 – ch1, 1sccblo in each of st across, a total of 25sts (S, M 20sts, L, XL 25sts, 2XL, 3XL, 4XL, 5XL 34sts), turn
(DEC) R.9 rep R.7 a total of 24sts (S, M 19sts, L, XL 24sts, 2XL, 3XL, 4XL, 5XL 33sts), turn
R.10 rep R.8 a total of 24sts (S, M 19sts, L, XL 24sts, 2XL, 3XL, 4XL, 5XL 33sts), turn
(DEC) R.11 rep R.7 a total of 23sts (S, M 18sts, L, XL 23sts, 2XL, 3XL, 4XL, 5XL 32sts), turn
LB R.12 – R.14 rep R.8 a total of 23sts (S, M 18sts, L, XL 23sts, 2XL, 3XL, 4XL, 5XL 32sts).
DO NOT CUT THE YARN
Side body: Follow what you did on the back panel for the side body.
Connect the shoulder part of both panels by facing RS together and sew with a yarn needle.
Trimming on the neckline: B
(RS) Rnd1 – sl kn on the shoulder part, ch1, sc in the same st, sc in each stitch across,
Tips:
- Try not to add too many stitches on Rnd1
- When it turns out to be a bit wavy you can DEC the next row instead of undoing it.
- There will be no ch in the next row as we are working in a spiral.
Rnd2 (DEC) – sc in each st across, however, I did one sc 2tog, a total of 90sc, ch1, cut the yarn.
Armholes:
Measure from the shoulder down to where you want to leave the space for the armhole, add a stitch marker. Do the same on the other side.
Suggestion armhole : 10” – 11”
I have 10” for the armhole. You can have more here but make sure you don’t make it too big. Best way is to have the model try it on and see how much space she/he needs.
Connect the panels: CHO
With RS facing each other, use a yarn needle to connect the panels together.
Tip: The best way to connect the panels is to sew from the bottom up this way when you need more or less space for the armhole you don’t need to undo from the beginning.
Simple sleeve: (RS)
B – Rnd1 – sl kn at the armpit, ch2, hdc in the same st, hdc in each stitch across, sl st on the first sc, a total of 80hdc,
Note:
- On Rnd1 you may have a different number count.
- There will be no ch in the next row as we are working in a spiral.
- Add a stitch marker on the first sc of the row as it helps for counting the row.
G – Rnd2 – hdcblo in each st across, a total of 80hdc,
Note: From Rnd2 on there is no sl st at the end of the row.
Rnd3 – scblo in each st across, a total of 80sc,
Rnd4 – Rnd29 rep Rnd3 a total of 80sc,
Rnd30 (DEC) – scblo in each st across with 5sts DEC, a total of 75sc,
Rnd31 – scblo in each st across, a total of 75sc,
Rnd32 (DEC) – scblo in each st across with 5sts DEC, a total of 70sc,
Rnd33 – scblo in each st across, a total of 70sc,
Rnd34 (DEC) – scblo in each st across with 5sts DEC, a total of 65sc,
Rnd35 – scblo in each st across, a total of 65sc,
Rnd36 (DEC) – scblo in each st across with 5sts DEC, a total of 60sc,
Rnd37, 38, 39 – scblo in each st across, a total of 60sc,
W – Rnd40, 41 – scblo in each st across, a total of 60sc,
Rnd42 (DEC) – scblo in each st across with 4sts DEC, a total of 56sc,
Rnd43 – scblo in each st across, a total of 56sc,
Rnd44 (DEC) – scblo in each st across with 4sts DEC, a total of 52sc,
Rnd45 – scblo in each st across, a total of 52sc,
Rnd46 (DEC) – scblo in each st across with 4sts DEC, a total of 48sc,
Rnd47 – scblo in each st across, a total of 48sc,
Rnd48 (DEC) – scblo in each st across with 4sts DEC, a total of 44sc,
Rnd49 to Rnd66 – scblo in each st across, a total of 44sc,
B – Rnd67 (DEC) – scblo in each st across with 4sts DEC, a total of 40sc,
Rnd68 – scblo in each st across, a total of 40sc,
Rnd69 (DEC) – scblo in each st across with 4sts DEC, a total of 36sc,
Rnd70 to Rnd80 – scblo in each st across, a total of 36sc,
CHO – Rnd81 to Rnd89 – scblo in each st across, a total of 36sc, sl st, ch1, cut the yarn.
Ribbing sleeve:
Follow everything above until R.79
Rnd80 – hdcblo in each st across, a total of 36hdc,
Rnd81 to Rnd89 – *Fphdc, hdc, rep* across ending with sl st at the beg, ch1, cut the yarn.
What I want you to know:
- If you want to have the sleeves wider and not snug like the ones I made in this pattern. Stop your last DEC at Rnd46 (48sc) and continue the rest of the sleeve with scblo until you get the length you desire.
- Block your work. It helps to relax the fibers and make the whole garment soft and flowy to wear. I prefer the steam block method. Watch how I steam block my garment.
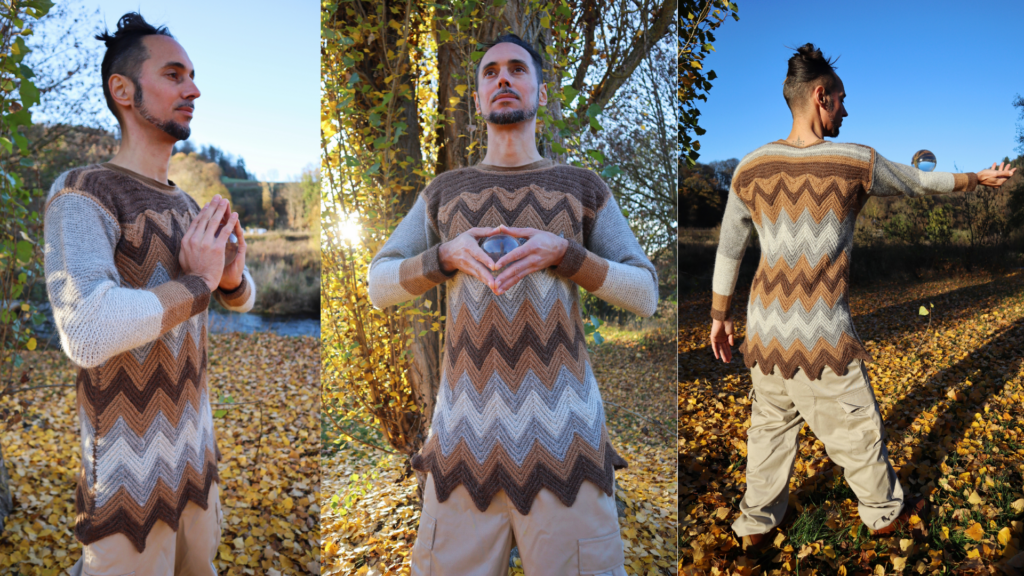

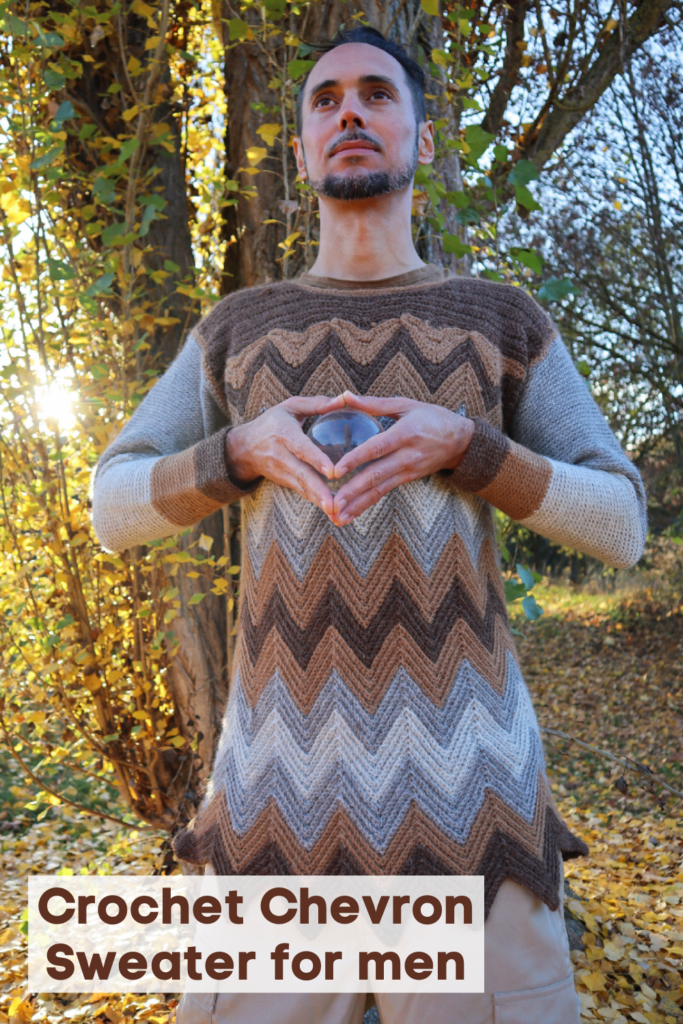
I hope you enjoy this crochet pullover!
Show off your project on our Crochet Tribe FB group!
Are you using Instagram? If so find me!
Maya xoxo




Leave a Reply
You must be logged in to post a comment.