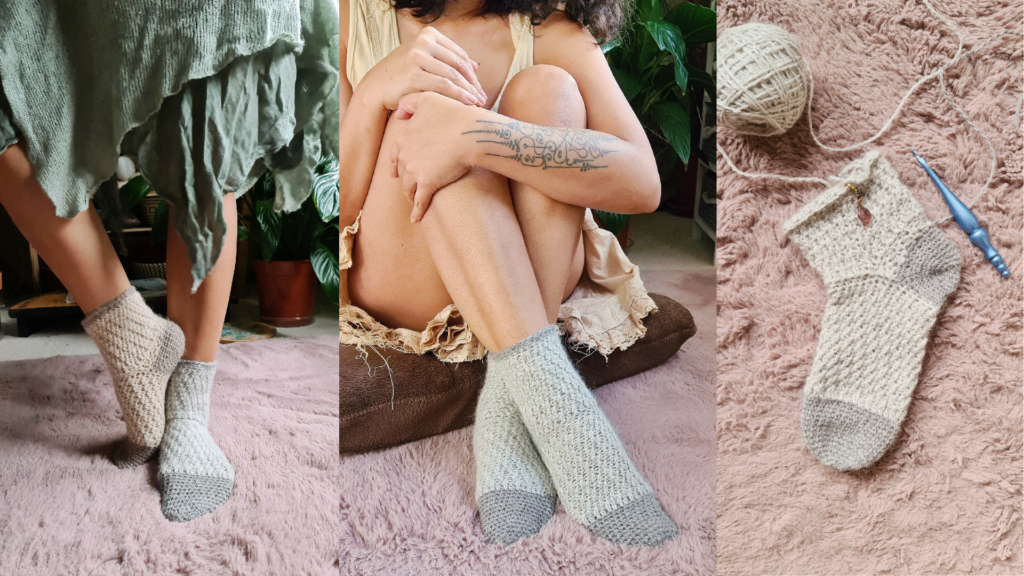
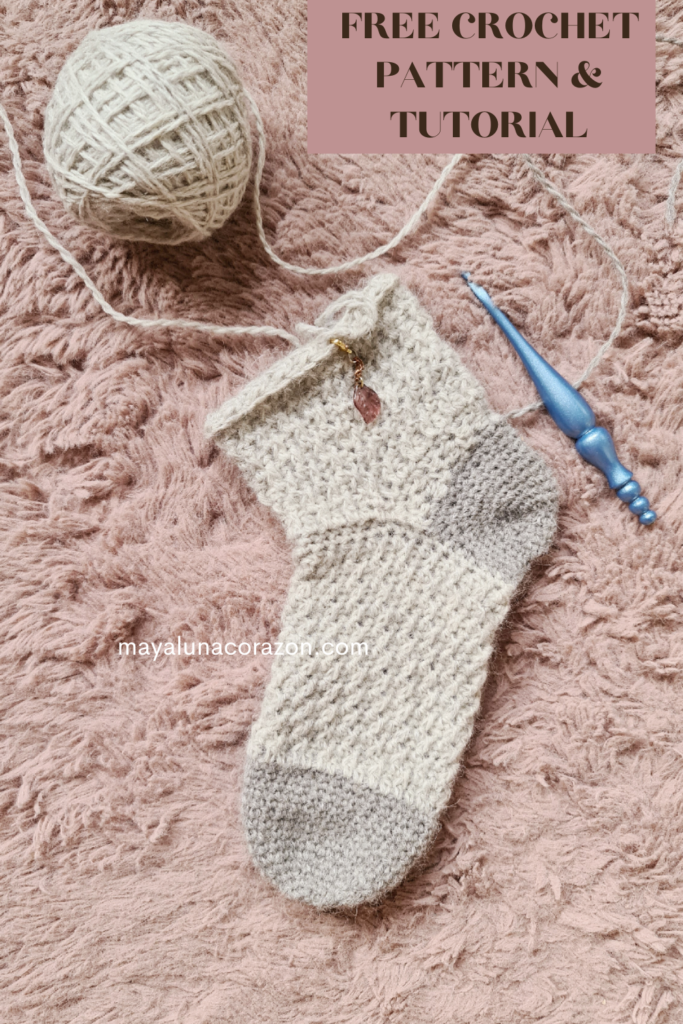
Learn how to crochet socks with a proper heel that you will never want to take it off. This pattern is more like a designing classroom in which you will learn how to measure your own foot or anyone foot that you want to custom these socks to fit them. Do not discourage just because you need to think alongside me. You will thank me later for teaching you how to measure your own foot and learn to crochet this way.
Sign up and download FREE printable Cozy Feet Socks project keeper!
The inspiration + Design
When you search “How to crochet socks” on the internet, you will see many socks come up on the search, but most of them are slippers. Crochet socks and crochet slippers aren’t the same things, though. Crochet slippers are like a tube, but crochet socks need to have heels.
I have seen many beautiful knitted socks on the internet but it’s not so many crocheted socks that I found beautiful for my taste. So I want to design one myself. The construction of this sock is quite easy just like any crochet toe-up socks out there, but the heel part of this sock together with two colors combination made this pair of socks unique in my point of view.
Yarn
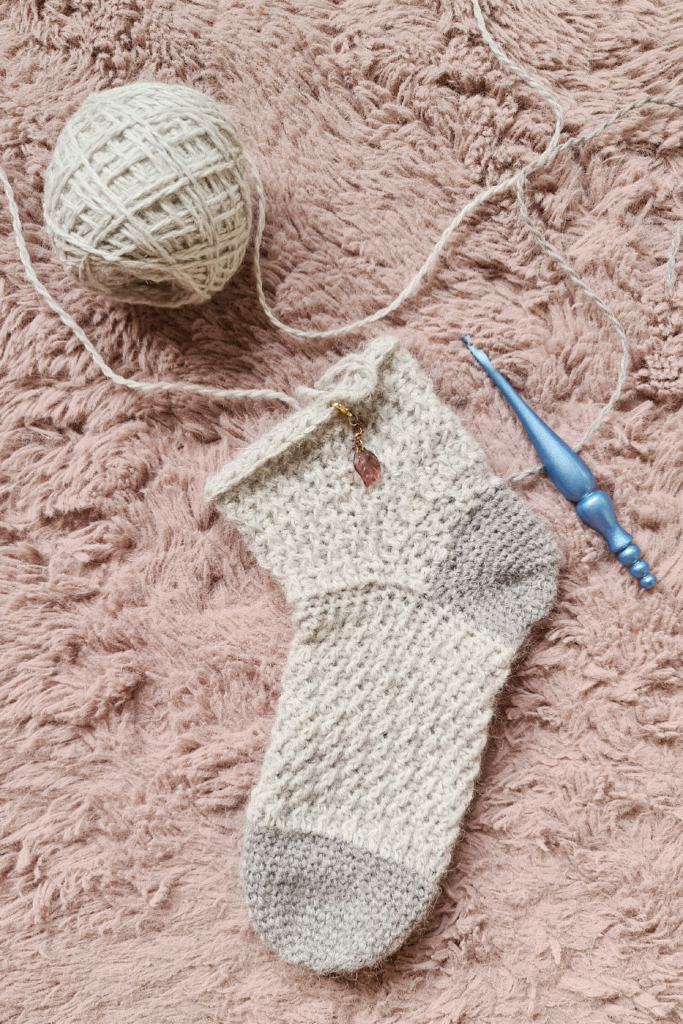
Even though Simply Alpaca isn’t a sock yarn, I feel like I need to try to work with it as I don’t crochet socks very often so I don’t have sock yarn at home. I have lots of natural Alpaca yarn and if it’s not worked out I will get a suitable yarn. Little did I know this yarn is not only ok for these socks but IT IS PERFECT!
Are you ready to learn how to crochet socks? You can grab the pattern below or scroll down to learn from a free pattern here!
PATTERN
- Get the ad-free, large print, printable PDF pattern HERE.
- Become a member and get all patterns throughout the month HERE.
- PIN this pattern to your Pinterest boards for later HERE.
Crochet | Skill level = Advanced beginners
Material
- Aran weight yarn/#4. Simply Alpaca I used 242 yards for 1 pair. I made 2 pairs of this sock. The first combination are Alonzo (27489), Alfie (27490), the second are Alfonse (27487), Alma (27485).
- Hook 4.5 mm
- Measuring tape
- Stitch marker
- Yarn needle & scissors
The pattern contains | Written instructions + Chart (only for ad-free version)+ photo + video
Pattern measured in inches (“)
Gauge swatch
16sc x 16rows = 4” x 4”
Abbreviation US term
ch = chain
sc = single crochet
Hdc = half double crochet
Fphdc = Front post half double crochet
sl st = slip stitch
sl kn = slip knot
st/sts = stitch/stitches
sk = skip
rep = repeat
beg = beginning
rnd/rnds = round/rounds
INC = increase
DEC = decrease
RS = right side
Note: The beginning ch if not stated as a stitch is simply meant to build up the yarn.
I demonstrate foot size 37 (EU)/ 6.5(US)/9”
Use your right foot to model and try it on along the way.
Minute marks/timestamps are according to the video tutorial.
Cover the toe 1:28
The body of the feet 4:59
The bridge 12:03
Upper leg 16:49
Trim 20:00
Heel 21:21
Make a magic ring
Note:
- I made my socks to fit snug to my feet and I blocked my socks to give it some room to be comfy.
- There will be no sl st at the end of each rnd.
- We are working in a spiral
- ALWAYS use a stitch marker to mark the beginning of the row as the stitch is hard to count without the stitch marker.
- Your last rnd must be an even number.
Cover the toes (Alfonse color)
Rnd1 – ch1, 10sc in the magic ring
Rnd2 (INC) – INC 4sc by adding evenly across the round, a total of 14sc
Rnd3 (INC) – INC 3sc by adding evenly across the round, a total of 17sc
Rnd4 (INC) – INC 5sc by adding evenly across the round, a total of 22sc
Rnd5 (INC) – INC 5sc by adding evenly across the round, a total of 27sc
Rnd6 (INC) – INC 5sc by adding evenly across the round, a total of 32sc
***INC more if you need to. You are aiming to have your work cover all of the toes.***
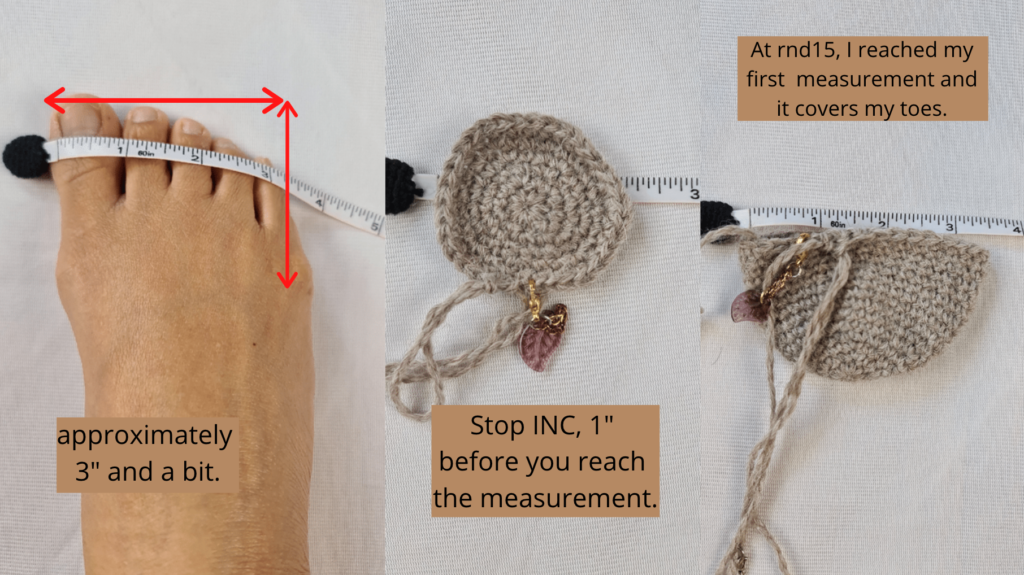
Rnd7 – sc in each sc across, a total of 32sc
Rnd8 – Rnd15 rep Rnd7
A total of 15rnds = 2”
The body of the feet (Alma color)
Note:
- We are working in the round.
- The beginning of the rnd is where the number stated. (Rnd1… etc)
RS
Rnd1 – hdc in each sc across, a total of 32hdc,
Rnd2 – sc in each hdc across, a total of 32sc
Rnd3 – *hdc in first sc, Fphdc around the post of next corresponding hdc 2rnds below, sk sc behind post st just made**, rep*-** across, ending with Fphdc around the post of next corresponding hdc 2rnds below, a total of 32sts.
Rnd4 rep Rnd2 a total of 32sc
Rnd5 – * Fphdc around the post of next corresponding hdc 2rnds below, sk sc behind post st just made, hdc in the next sc**, rep*-** across, ending with hdc in last sc, a total of 32sts
Rep Rnd2 – Rnd5 for the pattern
***You need to rep until you arrive at the arch. For me, it’s 6”***
Very important! When trying it on, pull your work to its fullest stretch ability BUT NOT TIGHT!
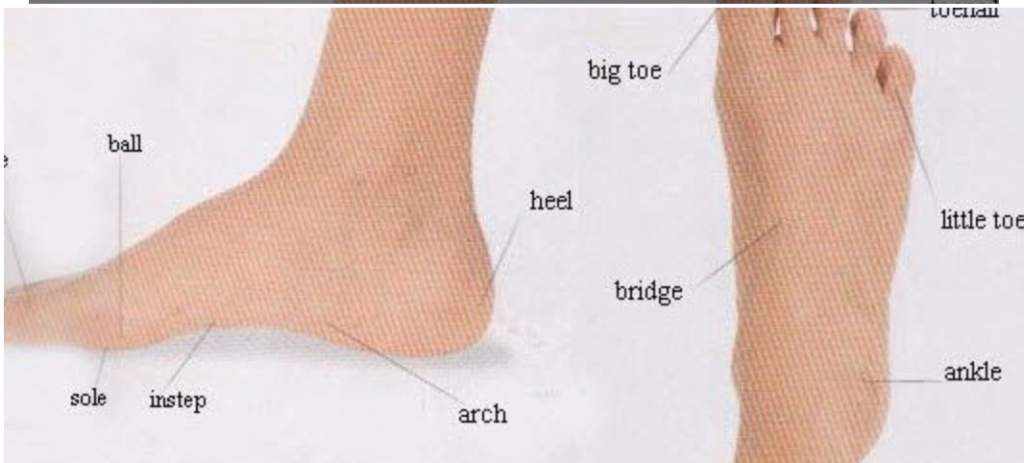
I have made a total of 24 rnds. My last rnd is on Rnd4
I recommend to stop either at Rnd2 or Rnd4
DO NOT CUT THE YARN, continue your R.1 of the bridge in the first st of the previous rnd.
My measurement from toe to arch = 6”
The bridge (Come from the outer side of your right foot)
R.1 – hdc in each of the next 3sts, turn
R.2 – ch1, hdc in each of the next 3hdc, turn
Rep R.2 until your bridge is approximately 1” before it touches the other side. DO NOT PULL TOO TIGHT!
I have made a total of 14 rows, ch1, cut the yarn.
***The bridge has to go under the ankle.***
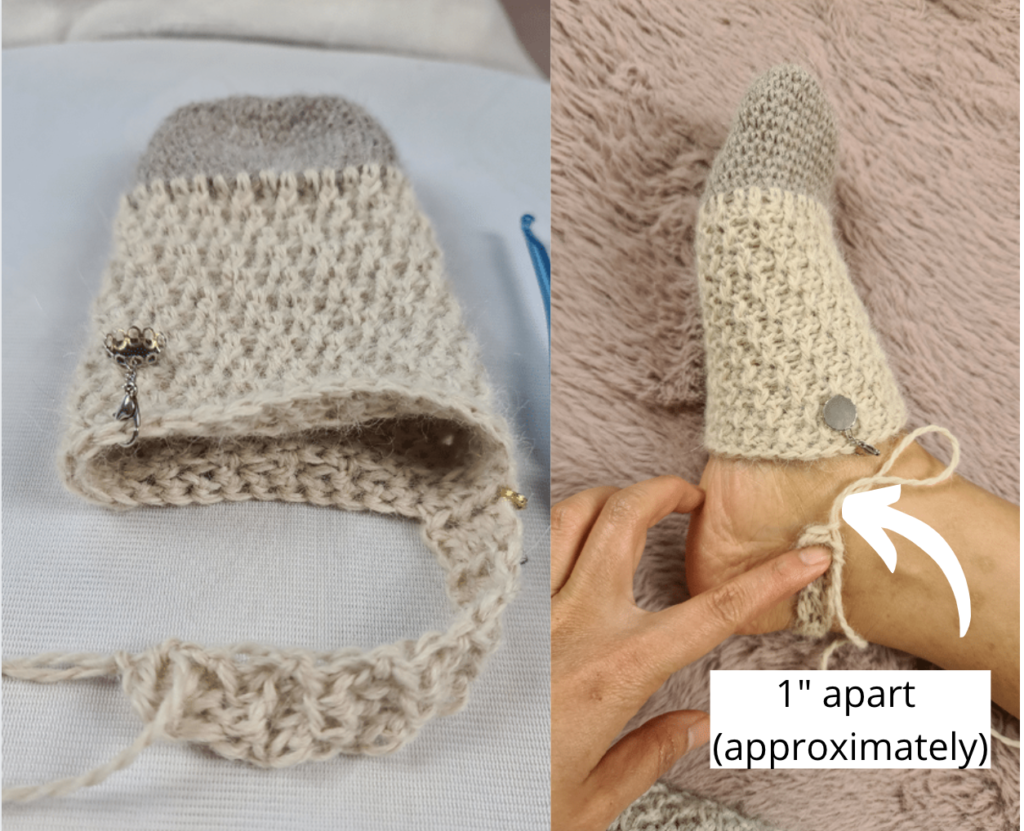
Connect the bridge
This is flexible, you can connect in different stitches.
I connected in the 15th, 16th and 17th stitch by sewing it together with a yarn needle.
Working on the top part of your foot (RS)
Sc rnd – sl kn, ch1, adding sc across, DO NOT ADD TOO MANY OR TOO FEW, but it needs to be an even number. I have made a total of 36sc, sl st to the first sc.
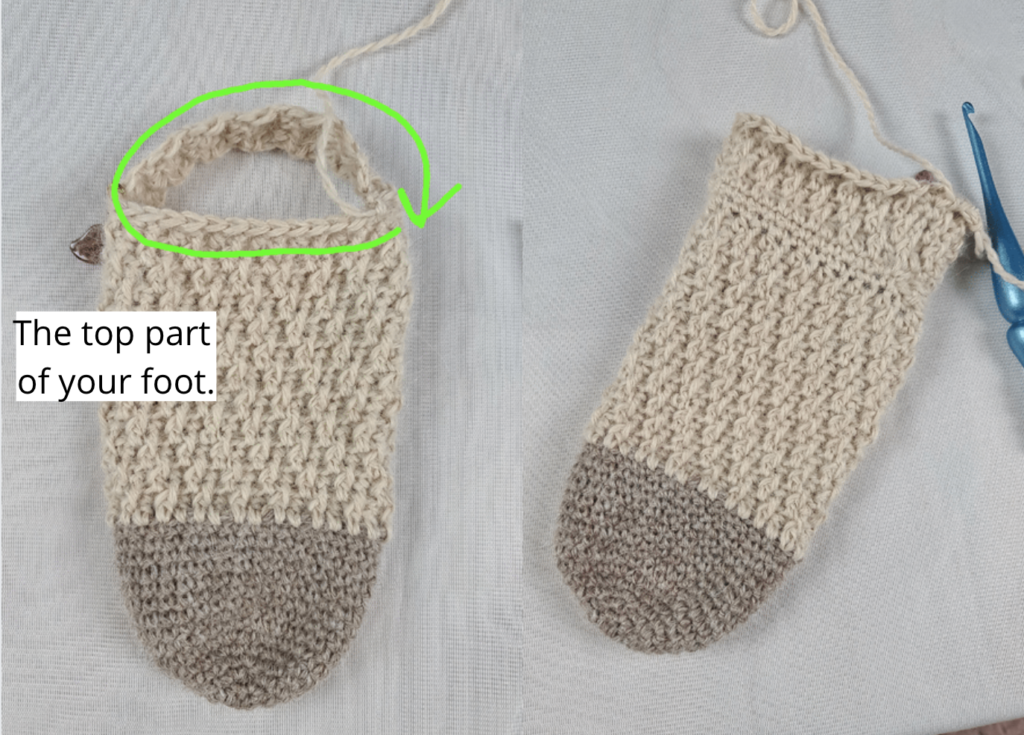
Upper leg
- DEC is optional.
- When you need to DEC, IT’S REALLY IMPORTANT TO DEC ON either the rep of Rnd3 or Rnd5 because the stitch alignment is based on those rnds.
- DEC needs to be made by skipping 2sts at the same time. Example: sk Fphdc & hdc sts, then Fphdc around the post of next corresponding hdc 2rows below, and so on……. (follow the pattern)
Rnd1 – hdc in each sc across, a total of 36hdc,
Rnd2 – sc in each hdc across, a total of 36sc
Rnd3 – *hdc in first sc, Fphdc around the post of next corresponding hdc 2rnds below, sk sc behind post st just made**, rep*-** across, ending with Fphdc around the post of next corresponding hdc 2rnds below, a total of 36sts
Rnd4 rep Rnd2 a total of 36sc
Rnd5 – * Fphdc around the post of next corresponding hdc 2rnds below, sk sc behind post st just made, hdc in the next sc**, rep*-** across, ending with hdc in last sc, a total of 36sts
Rnd6 rep Rnd2 a total of 36sc
Rnd7 (DEC) rep Rnd3 ***I DEC 2sts, a total of 34sts
Rnd8 rep Rnd4 a total of 34sc
Rnd9 rep Rnd5 a total of 34sts
Rnd10 rep Rnd2 a total of 34sc
Rnd11 rep Rnd3 a total of 34sts
Rnd12 rep Rnd4 a total of 34sc
Rnd13 rep Rnd5 a total of 34sts
Rnd14 rep Rnd2 a total of 34sc
Rnd15 rep Rnd3 a total of 34sts
Rnd16 rep Rnd4 a total of 34sc
Rnd17 rep Rnd5 a total of 34sts
Rnd18 rep Rnd2 a total of 34sc
Rnd19 (DEC) rep Rnd3 ***I DEC 2sts, a total of 32sts
Rnd20 rep Rnd4 a total of 32sc
Rnd21 rep Rnd5 a total of 32sts
Rnd22 rep Rnd2 a total of 32sc
Trim (Alfonse color)
Sc rnds – adding sc across, a total of 32sc.
I made a total of 3 rnds, last rnd, sl st, ch1, cut the yarn.
Heel (Alfonse color)
Note:
- You may have a different number of sc and that’s ok as long as it fits you.
- Your last rnd should be an even number.
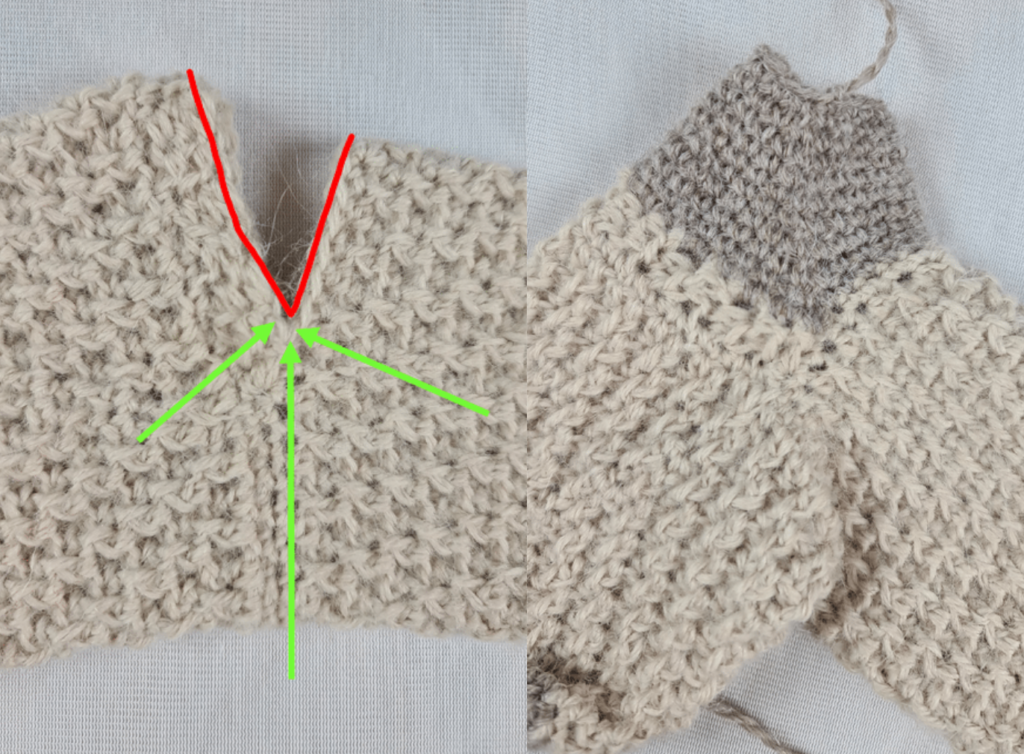
RS
Rnd1 – sl kn at the right side of your V, ch1, sc in the same st, sc across, a total of 34sc
Rnd2 (DEC) – sc2tog (this is right at the V corner), sc in each st across, until you get to the other corner (V) then sc2tog, sc in each st across, a total of 32sc
Rnd3 (DEC) – sc2tog (this is right at the V corner), sc in each st across, until you get to the other corner (V) then sc2tog, sc in each st across, a total of 30sc
Rnd4 (DEC) – sc2tog (this is right at the V corner), sc in each st across, until you get to the other corner (V) then sc2tog, sc in each st across, a total of 28sc
Rnd5 – sc in each st across, a total of 28sc
Rnd6 (DEC) – sc2tog (this is right at the V corner), sc in each st across, until you get to the other corner (V) then sc2tog, sc in each st across, a total of 26sc
Rnd7 (DEC) – sc2tog (this is right at the V corner), sc in each st across, until you get to the other corner (V) then sc2tog, sc in each st across, a total of 24sc
Rnd8 (DEC) – sc2tog (this is right at the V corner), sc in each st across, until you get to the other corner (V) then sc2tog, sc in each st across, a total of 22sc
Rnd9 (DEC) – sc2tog (this is right at the V corner), sc in each st across, until you get to the other corner (V) then sc2tog, sc in each st across, a total of 20sc
Rnd10 (DEC) – sc2tog (this is right at the V corner), sc in each st across, until you get to the other corner (V) then sc2tog, sc in each st across, sl st in the first st of the previous rnd, cut the yarn, pull the yarn through, a total of 18sc
Turn the work inside out and sew it closed with a yarn needle.
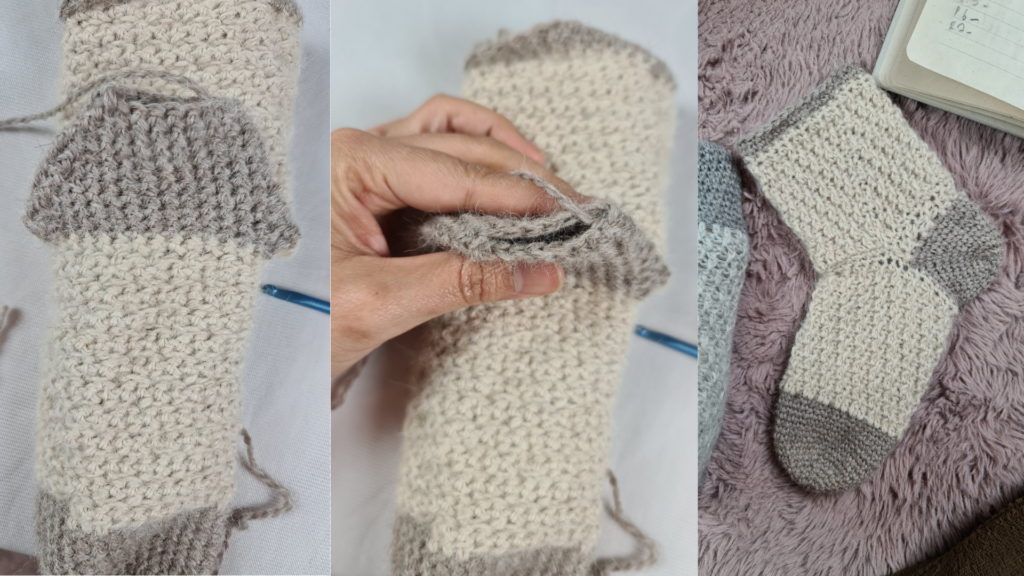
Sew in all excess yarn.
Rep everything to make another identical sock.
I highly recommend you block your socks.
See what our team made on Ravelry’s project page.

I hope you enjoy this cozy crochet socks!
Show off your project on our Crochet Tribe FB group!
Are you using Instagram? If so find me!
Maya xoxo




Leave a Reply
You must be logged in to post a comment.