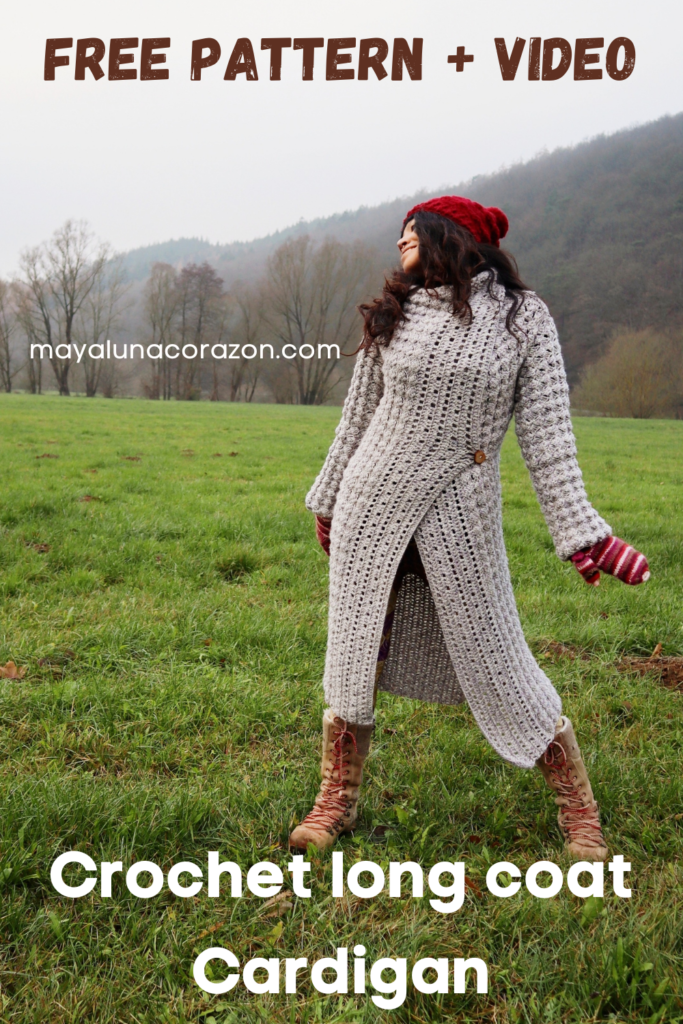
Cozy Grace Crochet long coat cardigan you will love! Learn how to crochet this beautiful long coat cardigan with a step by step free pattern & video instruction. This is a perfect project for Autumn and Winter.
Sign up and download FREE editable Cozy Grace Cardigan project keeper!
You can crochet this coat with or without the sleeves.
Crochet long coat cardigan – Sleeveless version
Yarn
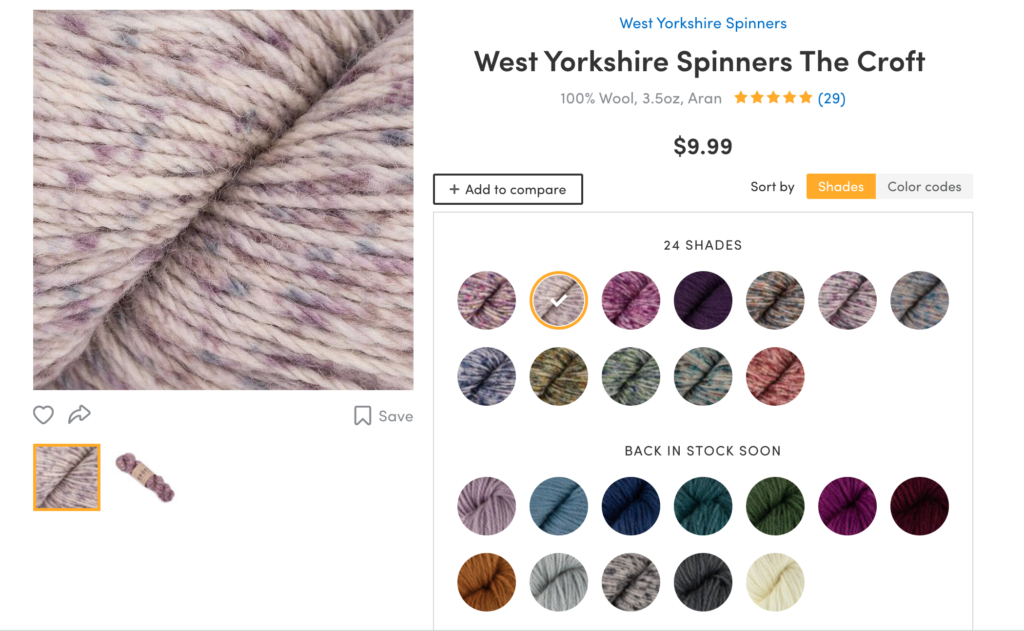
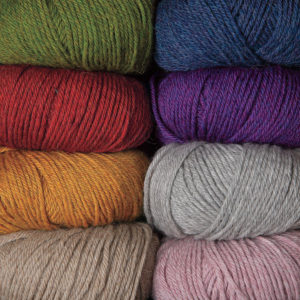
West Yorkshire Spinner the Craft is the perfect yarn for this crochet long coat cardigan. This is Aran weight yarn and it’s just perfect for this design. It’s made out of 100% wool to keep you warm. I got mine from Love Craft com in Clousta color. They do have many colors to choose from.
Inspiration
I got inspire by the Winter Goddess I saw in my head. And for that, I create this piece to cherish her: the Snow’s spirit, the Goddess of stillness who inspires me. I chose the shade of white for this design, which represents her in my point of view. If you ask me how I constructed the whole piece? I actually have no idea. The only thing I know is that I want to crochet a long coat cardigan that will embrace me and keep me warm. I want to create something simple yet, elegant, and dazzling to wear through the cloudy days/weeks/months. This piece was designed in December 2019.
Instruction video
Watch the instruction video below. It will help you understand the anatomy of this pattern and how to measure your body properly.
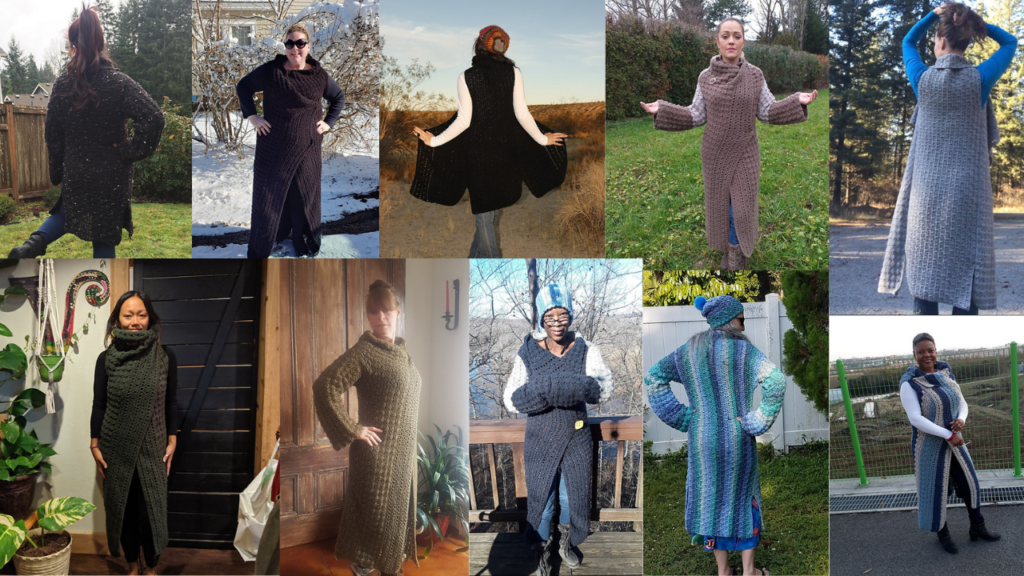
This pattern is showing you how to measure your body to find the perfect fit for you. If you wish to read each testers’ information, you can purchase a printable pattern on my Ravelry or Etsy shop.
Skill level: Advanced Beginner
Material:
- Aran weight yarn, My choice of this design is West Yorkshire Spinners The Croft Sleeveless version, I used about 8 skeins, which is 1,460 yards, + 4 skeins/728 yards for the sleeves. Total is 2,188 yards
Yarn used for a complete version.
XS/S yarn used between 2,188 yards
S/M yarn used between 2,388 yards
M/L yarn used between 2,588 yards
L/XL yarn used between 2,788 yards
2X yarn used between 2,988 yards
- Hook 6mm & 4mm (optional for connecting the panels with sc stitch)
- Stitch markers
- Scissors & yarn needle
- 2 Buttons (1” diameter)
- Measuring tape
The pattern contains | Diagram + well-written instructions + photos + video.
Pattern measured in inches (“)
Abbreviation US term
- Stitch used & code
- ch = chain
- st = stitch
- sl kn = slip knot
- sl st = slip stitch
- sc = single crochet
- dc = double crochet
- Fpdc = Front post double crochet
- hdc = half double crochet
- rep = repeat
- WS = wrong side
- RS = right side
Note: The beginning ch if not stated as stitch it’s simply meant to build up the yarn.
Size – Measure right under the armpits/above the breast. Watch this video for more info.
***Suggest watching the video to understand the structure of this design***
- XS/S – 32” – 34”
- S/M – 36” – 38”
- M/L – 40” – 42”
- L/XL – 44” – 46”
- 2X – 48” – 50”
***This pattern is easy to modify in all sizes. You can even make it in children’s sizes. You need to be able to use the measuring tape. And most importantly read the pattern and watch the instruction video.***
In this pattern, I demonstrate size XS/S, my measurement under the armpits/above the breast is 34”
The pattern using a diagram
Gauge swatch with 6mm hook
12dc x 8rows = 4” x 4”
The overview of the design.
It’s simply 3 panels of the rectangle.
Left, back (middle), right
The number of inches will adjust by different sizes.
These numbers are for XS/S
Note: The whole piece is made out of the multiple of 4. To find the right number ch, start by measuring from the shoulder down over the knees + 7” (the collar), and that should be the approximate length of your cardigan.
My cardigan measures 45”. I am 160cm tall.
Front panel: (The left & the right panels)
Outer pattern: A multiple of 4 + 1ch
I started with 164ch + 1ch
Very important: Pull the chains to its fullest stretched ability.
Download the pattern to see the starting chain from testers.
R.1 – dc in 4th ch from hook, dc in each ch across, turn
R.2 – ch4 (counts as dc, ch1), skip next dc, dc in next dc, *ch1, skip next dc, dc in next dc, rep from* across, ending with dc in 3rd ch of turning ch, turn
R.3 – ch3 (counts as dc), *dc in next ch1-space, dc in next dc, rep from* across, ending with dc in 3rd ch of turning ch, turn
R.4 – ch3 (counts as dc), skip first dc, dc in each of next 2dc, *ch1, skip next dc, dc in each of next 3dc, rep from* across, ending with last dc in 3rd ch of turning ch, turn
R.5 – ch3 (counts as dc), skip first dc, dc in each of next 2dc, *dc in next ch1-space, dc in each of next 3dc, rep from* across, ending with dc in 3rd ch of turning ch, turn
Rep Rows 2-5 for pattern
IMPORTANT: In the last row of the repeating, you will need to INCREASING 1dc at the beginning and 1dc at the end. A total of 2dc increasing to be able to have a multiple of 4 again.
In the process of creating the design above we have lost 2sts.
164 + 1 = 165, 165 – 3(see in R.1) = 162 and for that we need the add 2dc in the last row.
Note: Count your stitch as this point and whatever number you got, make sure it is a multiple of 4, you might need to add just 1dc increase, instead of 2.
Size XS/S, S/M make a total of 11 rows on this part.
M/L, L/XL makes a total of 13 rows on this part.
2X makes a total of 15 rows on this part.
DO NOT CUT THE YARN WE ARE CONTINUING TO THE INNER PATTERN.
Front panel: (The left & the right panels)
Inner pattern: A multiple of 4
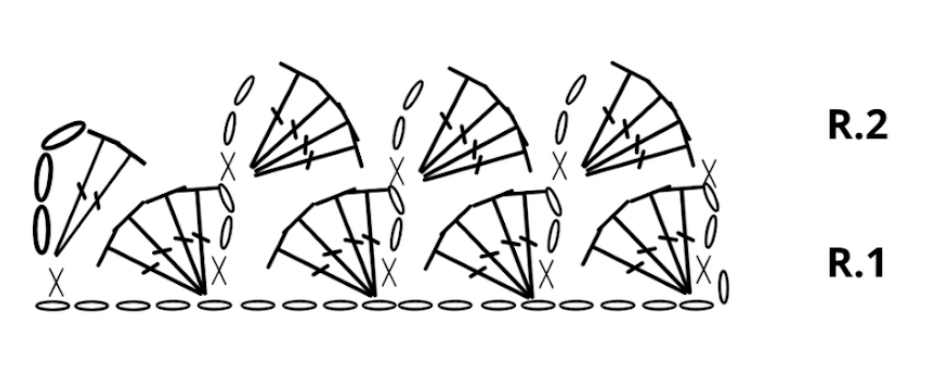
R.1 – ch2, (sc, ch2, 4dc) in second ch from hook, *skip next 3ch, (sc, ch2, 4dc) in next ch, rep from* across to within last 4ch, skip next 3ch, sc in last ch, turn
Note: Your first set of (sc, ch2, 4dc) will slightly curve out of the line at this point, some less, some more depending on the tension. do not worry everything will turn out fine as it is part of the pattern.
This is how my one looks like.
R.2 – ch3 (count as dc), 2dc in first sc, *skip next 4dc, (sc, ch2, 4dc) in next ch2-space, rep from* across to within last ch2-space, sc in last ch2-space, turn
Rep R.2 for the pattern, only that you need to sc in last ch3-space, turn
Size XS/S, S/M makes a total of 14 rows on this part.
M/L, L/XL makes a total of 16 rows on this part.
2X makes a total of 18 rows on this part.
WATCHOUT! The complete front panel should be about 1 ½ less than the back panel. Therefore, you need to measure your panel again before adding the finishing row.
Finishing row for all sizes – ch3, 1dc in first sc (or you can see it as 4th st from hook), *hdc in next dc, 1sc in each of next 3dc, skip ch2-space, rep from* across, ending with 1dc in each of next 2dc, 1dc in 3rd ch of turning ch, ch1, cut the yarn.
YOU MUST HAVE THE SAME STITCH AS YOU HAVE STARTED.
I HAVE 164sts
Rep all steps to create another identical front panel.
A suggestion in inches for the front panel:
XS/S, S/M – 13 ½” – 16”
M/L, L/XL – 16” – 20”
2X – 20” – 25”
Remember is all about the measurement of your body.
Download the pattern to see info from all testers at this point.
Back panel: A multiple of 4 + 1
Make ch according to your panel sts. I made 164 ch + 1
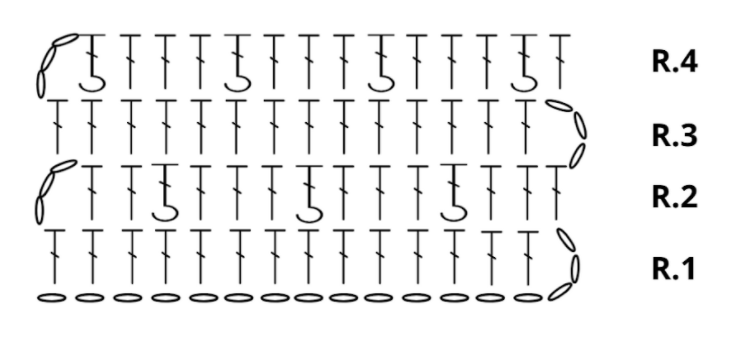
R.1 (WS) – dc in 4th ch from hook, dc in each ch across, turn
R.2 – ch3 (count as dc), skip first dc, dc in each of next 2dc, *Fpdc around the post of next dc, dc in each of next 3dc, rep from* across, ending with last dc in 3rd ch of turning ch, turn
R.3 – ch3 (count as dc), skip first dc, dc in each stitch across, ending with dc in 3rd ch of turning ch, turn
R.4 – ch3 (count as dc), skip first dc, *Fpdc around the post of next dc, dc in each of next 3dc, rep from* across, ending with dc in 3rd ch of turning ch, turn
R.5 rep R.3
Rep rows 2-5 for the pattern
Pull your work to it’s stretched ability when measuring.
I have made a total of 27rows = 15” according to my calculation.
34” divided into 2 = 17” – 2” = 15”
Suggestions rows
- XS/S – 32” – 34” = 25 – 27rows
- S/M – 36” – 38” = 27 – 30rows
- M/L – 40” – 42” = 32 – 35rows
- L/XL – 44” – 46” = 35 – 38rows
- 2X – 48” – 50” = 38 – 40rows
Remember is all about the measurement of your body.
Connecting the panels:
I used 4mm hook sc connecting the front panel, from an inner pattern with the back panel, right side facing each other. And sc from the top/collar down 28sc, skip 7” = 23sts (the armhole), sc down toward the bottom, stop 7” before the trim.
Rep everything on the other side.
Adding the buttons:
Watch this video and learn how to find the right position to add the buttons.
Adding the sleeves:
Preparing round for multiple of 4 + 1 ch
Important things to know:
- I choose to start my sl kn under the armpit.
- When adding the hdc st make sure to spread out evenly. The front and the back should be equally the same number. For example, I have made 52hdc in the preparing round and I have made 26hdc in the front panel and 26hdc in the back panel.
- If your armhole is wider than mine one which is 7”, then add more hdc sts.
Preparing round (RS) – sl kn under the armpit, ch2 (to build up the yarn), 1hdc in the same st, 1 hdc in each stitch across, a total of 52hdc, sl st with the 2nd ch of the beginning.
Scroll down to see how many hdc sts testers have made.
R.1 – ch1, (sc, ch2, 4dc) in second st from hook, *skip next 3sts, (sc, ch2, 4dc) in next st, rep from* across to within last 4sts, skip next 3sts, ending the round with sc in first ch of the beginning ch (green color), sl st in the first sc, sl st another 2 times in ch2-space, TURN don’t forget to TURN!
R.2 – now you will be working in the other direction (see in the diagram in red color & arrow), 2dc in sc from previous round, *skip next 4dc, (sc, ch2, 4dc) in next ch2-space, rep from* across to within last ch2-space which is now shown as the beginning round of round1 (light pink color), (sc, ch2, 4dc), ending the same way as R.1 but sl st only 2 times in total (see light pink color for guidance), TURN don’T forget to TURN!
Rep R.2 for the pattern
I have made a total of 37 rounds
Finishing round – after sl st 2 times to finish your last rep R.2, do not turn at this point, ch1, *sc on top of each 4dc of the set, rep from* across, ending with sl st with ch1 from the beginning, ch1, cut the yarn.
Measurement of the sleeve at this point is 20 ⅛
Rep all steps on the other side to create the identical sleeve.
Download the pattern to see info from all testers.
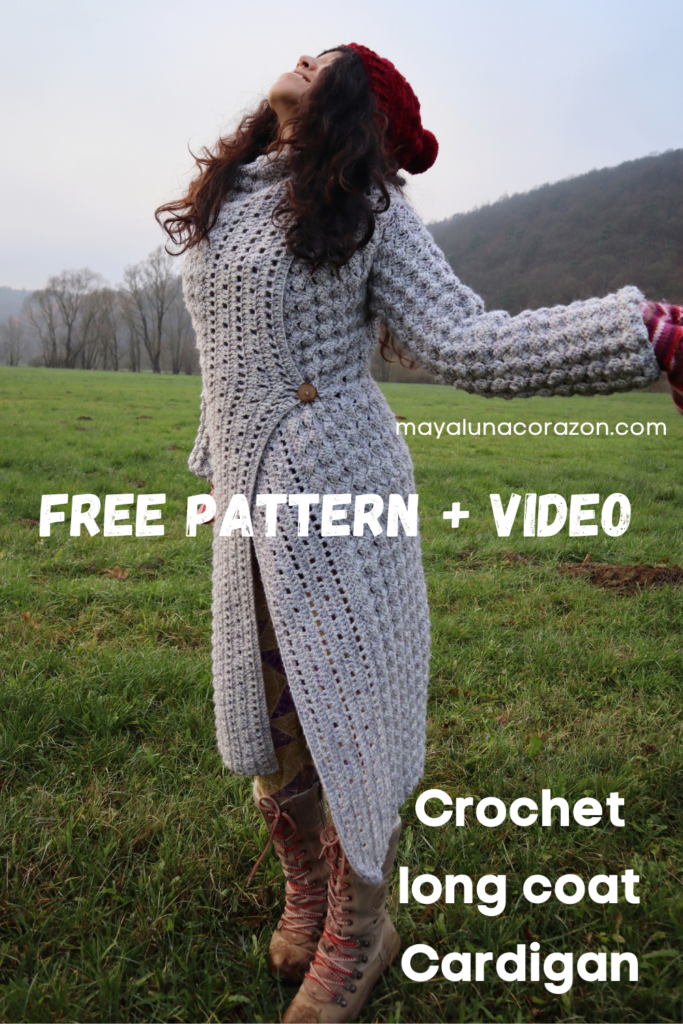
***Changed I have made at this point after added the sleeves I removed the buttons and reattach one button at the front (see in my photo below), and I made ch of 40ch to connect the collar part instead of the button as I like to have the collar be more flexible on positioning the closure.
PIN IT ON YOUR BOARD
Are you enjoying this Cozy Grace long coat Cardigan free pattern? If you do, show off your project on our Crochet Tribe FB group!
Join my daily update on Instagram!
Maya xoxo
SIGN UP and get access to the resource library only for members!
Disclaimer: This post contains affiliate links. Meaning, at no additional cost to you, I will earn a commission if you click through and make a purchase. This way, you help sustain my work and help to provide free content. All opinions are my own.





Leave a Reply
You must be logged in to post a comment.